
Guardians Glade CM
Written by Lily
In-depth guide covering mechanics and strategies.
This is a guide for Guardians Glade CM, check out the builds for Guardians Glade CM here.
Guardian’s Glade CM Guide
Health | 74,322,360 |
|---|---|
Time Limit | 10 minutes (hard enrage) |
Modes | Normal and Challenge |
Important Graphics Settings | Character Model Limit |
Damage Type | Power |
Useful to Have |
|
Most groups will run primarily power classes. The fight generally requires plenty of  Stability or Stunbreaks - bringing your own can really help.
  Superspeed can also be useful for getting out of Sand or Waves, or in case Kela accidentally gets too many stacks of Relentless Speed.
Strategy
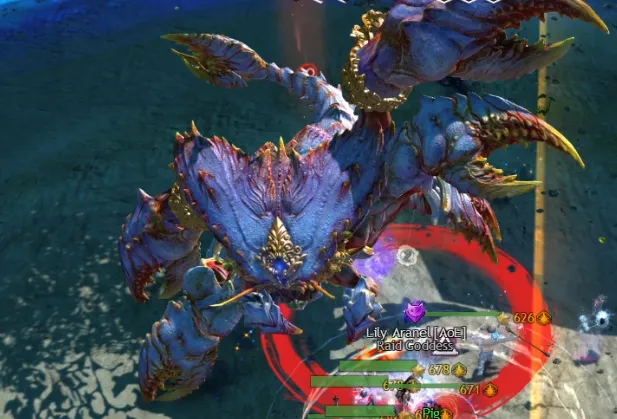
Kela will spawn shortly after picking up the Artifact. She spawns next to a fern that has amazing wiggle physics, which you can use to entice the Dps players to stand there. She has quite a long “getting out of the ground” animation, so the heals and boondpses do have plenty of time to give boons. The Kite can easily give boons, walk through her and plan their blink out.
Kiting
Kela follows the person holding the Artifact. You can tell this by them having the Special Action Key and also having a purple diamond over their head.
Ideally the Kite will take Kela towards the Ocean side during the Storm phase, allowing the stack to kill Crocs on the Cliff side. Then once the Kite brings Kela to eat the dead Crocs, the stack can move through Kela’s hitbox whilst she’s above ground, and go clear the Ocean side/kill Crocs there. This allows the Kite to then bring Kela back towards the middle of the arena for the Sunny phase. Note some groups like to keep Kela on the Ocean side, so will kill the Crocs in the middle and then let the Kite take Kela back towards Ocean. Both work, pick whichever is best for your squad.
As Kela gains Relentless Speed stacks during this phase, a Kite wants to have good movement abilities. If the Kite gets caught by Kela, she will use Ambush to eat them. This happens regardless of if they blink away - it’ll just look like they randomly die halfway across the platform. The hitbox for the Ambush includes a little bit further than the front of her hitbox so position accordingly.
Phases
Sunny Phase
During this phase, focus on killing the boss. Some commanders will ask for ranged (piercing) dps to target some crabs, but mostly your goal is to get Kela as low as possible each time this phase appears.
Storm Phase
During this phase, Kela burrows into the ground and follows the person with the artifact (“Kite”). Elite Crocs spawn in threes during this phase. The goal is to kite Kela around whilst the rest of the squad kill Crocs and Crabs, then bring her back to eat the Crocs and remove her speed stacks, and then do this again until the end of the phase. Each new Storm phase you reach also adds another Tornado to the arena.
Mechanics
Fixate / Cursed Artifact
The person who is holding the Cursed Artifact gains Kela's Fixation. She will follow them during Storm phases and be partially tanked by them in the Sunny phases.
Kela’s tanking mechanic is to alternate between the Kite and the furthest enemy (friendly to us). She counts pets, phantasms, minions and mechs as enemies. Do not chase her if she moves away as she will come back to where you want her.
If the Kite drops the Cursed Artifact, it is very important that someone goes over to the small white circle and temporarily picks it up as Kela will attempt to reclaim it. There is no debuff from doing so, but having someone with some movement ability is useful. Everyone else should go and resurrect the Kite as soon as possible so they can get back to kiting. Once ressed, the temporary holder of the Cursed Artifact can use the Special Action Key (@throwrelic) to throw it back to the Kite.
If at any point the person with the Cursed Artifact is eaten by Kela, she will wipe the squad as she now has the Artifact.
.webp)
During the Storm phase, Kela will burrow underground and chase the Kite. Whilst she is in the ground, she is invulnerable, although can still be targeted with skills. It’s important to be careful if you have leap or teleport skills that you are not targeting Kela. If you end up either in her hitbox or too close to her, whilst she is underground, she will pop back up and eat you (fully dead). This is called “Ambush”. If Kela is outside of the ground, you can move through her hitbox.
Note that using a blink skill will not save you from Ambush - it’ll just look like you randomly die halfway across the platform. The hitbox for the Ambush includes a little bit further than the front of her hitbox so position accordingly.
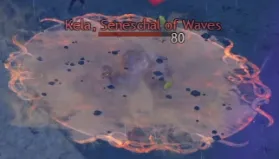
Auto Attacks
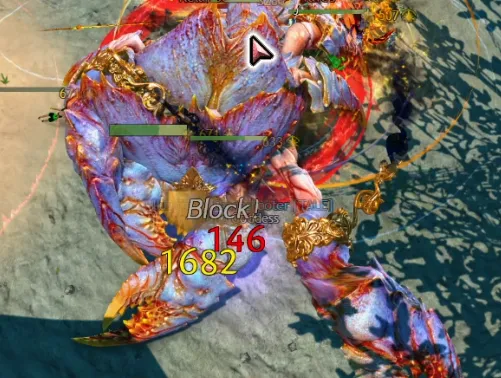
Kela has some “auto attacks”. These are called “Claw Slam”, “Rending Claws”, “Sidle Step” and “Stomp”.
- Claw Slam is a cone in front of her. It knocks down those in its area as well as dealing damage. It can be mitigated with Stability,
 Aegis or
  Distortion.
 - Rending Claws is when she uses her claws to the front of her. This hits twice.
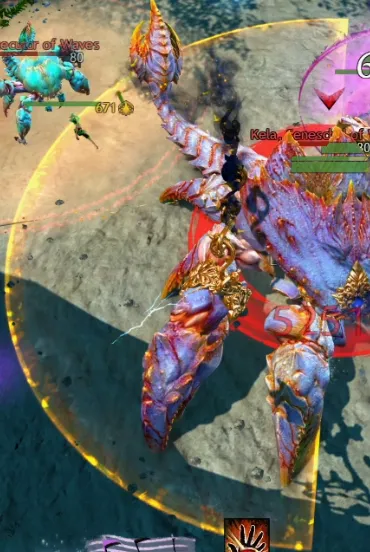
- Sidle Step is probably the most annoying, as it’s where she moves like a crab around people. It also knocks down, but can be mitigated with Stability. Stomp is the two large semi-circles to her left and right. These deal quite a bit of damage and cannot be blocked.
- Stomp is the two large semi-circles to her left and right. These deal quite a bit of damage and cannot be blocked.
Pulsing Field
Kela also has a pulsing damage field. This applies damage every 3s. It doesn’t do very much damage, so it’ll mostly get outhealed by standard healing practices when giving boons.
Relentless Speed
Kela gains an increase speed buff (Relentless Speed) every 2s during the Storm phase. She gains additional stacks every 2s if she is in the Sand created by Crabs. The speed buff can be removed by feeding her Crocs.
Rend Asunder
Kela will perform a Throw where she throws whoever is in front of her over her head. She points her claw at them, then whips it back and throws. There is also a beep sound cue. This attack damages, applies a 3s Stun and applies a debuff called Shredded Armour, which increases the amount of damage taken by whoever has it. Shredded Armour stacks and stays for 2 minutes if no more stacks are applied. Newly applied stacks reset its duration. Even a full Minstrel healer will quite quickly take a lot of damage under Shredded Armour stacks as it applies a 20% incoming damage increase multiplicatively. If you are not the Kite, it is highly recommended to put your Personal Target on them so you can make sure you are not on the same side of Kela as them to avoid the Throw.
The Throw part of the mechanic cannot be avoided. The damage, stun and Shredded Armour debuff can be avoided by blinking away out of range when she starts the animation. You want to watch Kela for this as blinking when the sound happens is too late and the debuff will be applied. You can also stand 400 range away and dodge backwards instead of blinking, as the required range is 500 units.
You can aim the Throw by where you’re standing before blinking. Where you blink has no effect on the end position of the Throw. There is a visual “bug” where you can be teleported to the end of the animation and look like you just do a big bunny hop in place. It is very important to not be thrown into the Waves.
Usually Throws are at the end of the Defiance Bar, but this can desync. Make sure to always move through Kela so only you are thrown.
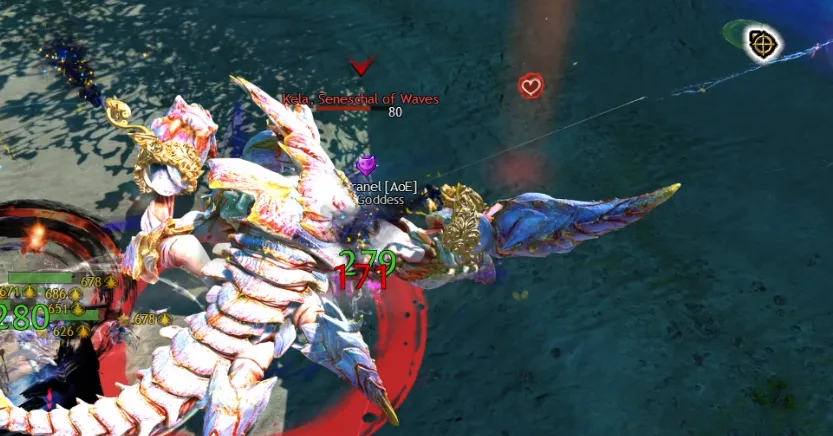
Scalding Wave
There are 3 sections of Waves across the arena. These do overlap slightly, and their “spawn area” is slightly larger than the wave area itself. Waves start at the Ocean side and move towards the Cliff side. They have an orange indicator and an arrow indicator. The arrows are only useful for direction - they do not indicate where the wave will be. The wave will be where the orange indicator is.
Waves spawn every 15s in the Sunny phase and every 10s in the Storm phase. They do not spawn in the section that Kela is in. Most strategies rely on keeping the larger middle section from spawning a Wave. It is the Kite’s job to keep Kela inside this section mostly, but the rest of the group should ensure they do not move out of the area whilst in the Sunny phase to ensure she does not move to them and outside of the central strip.
Unlike in NM, where Waves only knock and apply 10 stacks of  Burning, in CM Waves are an instant death mechanic. You can be thrown over Waves by Kela and survive, but she can also throw you into the Wave, killing you instantly. Waves will also instantly kill Pets and Minions so be careful where those are.
Waves will reduce or clear the Sand that no longer has an active Crab in it. In NM 1 Wave removes the Sand entirely. In CM each Wave will reverse 1 expansion of the Sand, removing the Sand completely once it gets to its spawning size.
Tantrum
Defiance bar | 3,600 |
Kela will gain a Defiance bar periodically throughout the fight. Whilst she has this bar, she also casts “Tantrum”, where she slams the ground and does big damage to everyone. In NM, most groups CC as fast as possible to avoid this damage. In CM, most groups try and keep the CC bar up for as long as they can. The reasoning is fairly simple - Kela can’t cast her Bees skill whilst she’s having a Tantrum!
Distortion and  Invulnerability skills can be used to avoid the damage of Tantrum whilst you are under their effects.
Crabs
Health | 471,888 |
Crabs should spawn on a timer during the Sunny phase. There is a phasing bug where they can continuously spawn in the Storm phase. In CM, getting this bug is usually a wipe. The phasing bug seems to happen if a crab is killed during the transition between Sunny and Storm. It will often persist between fight attempts unless the instance is reset.
Killing Crabs extends the length of the Sunny phase as more Crabs alive adds more progress towards the Storm phase bar. Most groups will avoid killing them until Storm phase starts. This is due to the change in the Bees mechanic from NM.
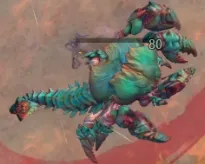
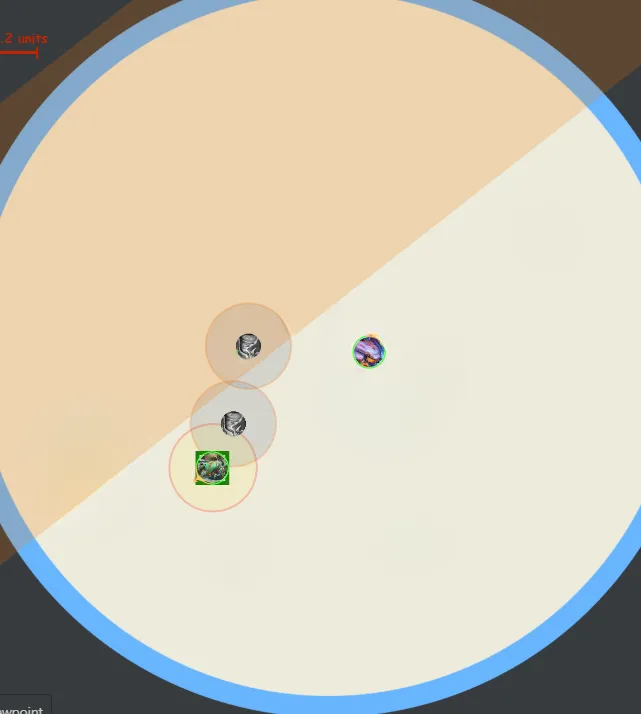
You might hear tales of “Crab 4”. This is the Crab whose Sand is not washed away by the side waves - see the image. Standard strats for this fight attempt to keep Kela inside the middle lane so that waves only spawn at the sides. Crab 4 usually needs to be killed as soon as possible after it spawns, but some commanders may wait until the start of the Storm phase - do check.
Sand Puddles
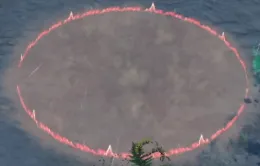
The biggest annoyance that Crabs cause is their Sand puddles. These circles of Sand expand over the time that the Crab is alive. If you go into them, they swirl you around in CM towards their centre, like a whirlpool. Movement skills and teleport skills can be used to get out.
Note the Sand also makes you walk slower, gives Kela boons, and increases the speed that she gets her speed stacks. The boons provided by the Sand are 25  Might,
  Protection and
  Resolution, which will lower both power and condition damage done to her. The Sunny phase is also shortened depending on how much Sand remains in the arena.
The sand can be cleared by a Wave washing over its centre. All except one Crab’s sand (crab 4) can be cleared by the side waves. It is still important to not have too much sand around to prevent hampering movement and shortening the Sunny phases where you can do your dps burst.
Finally, it’s important to note that it can be very hard/impossible to see Kela in the Storm phase if she is in the Sand puddles. They are slightly raised above the floor texture, so her big orange hitbox is usually under them when inside them.
Tornadoes
There are Tornadoes roaming the platform from the first Storm phase onwards. You gain one new Tornado that stays for the rest of the fight per Storm phase. Tornadoes have an orange base circle with a twister above them. They knock you back, but this can be mitigated with Stability. It is usually expected that healers and boondps will provide Stability for the Tornadoes, but do still walk out of them as they might not have skills up for every single one, depending on how other mechanics line up. Be especially careful around Waves appearing to ensure you don’t get knocked into one accidentally.
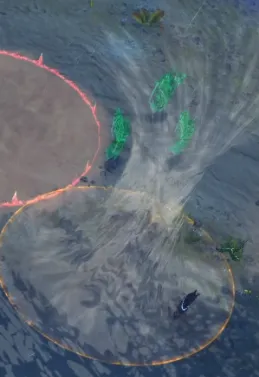
Bees (Biting Swarm)
By far the deadliest and most dangerous mechanic in this fight are the Bees. Bees create a debuff on the person that they’re on, which ticks upwards. Each stack of debuff does damage to the person, meaning more stacks = more damage. The stacks start at 2% max health per second and increase by 1.5% max health per stack.
Bees start slightly after the first Throw. Bees are contagious and will spread to people standing inside the small orange circle under an affected person. Spreading your Bees to another person, who didn’t have any, resets your stacks back to 1, which gives us a way to keep the ticking damage under control. Stacks are per person, and require a reset per person.
Note that in CM the Bees do not have a timer, and will continue to be around for the entire Sunny phase.
For most groups, their Bee mitigation strategy will look like:
- Bee target moves off group slightly so they don’t accidentally clip people.
- The non Kite healer resets the Bees at 10+ stacks.
- When the 2 people with Bees get to 10+ stacks, the 2 boondps players reset 1 person each.
- If you aren’t phasing when the 4 people are at 10 stacks again, the dps players can take them for a bit.
The coordination for this is usually done via voice comms counting from 10 (so 11, 12, 13…). If someone is not helping you by 15, you are within your rights to go tag a person yourself as emergency life saving measures. Just try not to tag the entire squad!
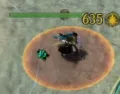
There is the possibility to “outheal” the first Bee target past 10 stacks to slightly delay additional people taking the Bees. The healers would focus the person with 10 stacks for their healing and then reset the stacks when they cannot outheal anymore. This can make the fight much easier if the healers get good at the outhealing. Everyone else mostly just needs boons.
Veteran Crocodilian Razortooth
Health | 157,296 |
During Sunny phase, we have some Veteran Crocs spawn. These are less troublesome versions of the Elite Crocs. They have fairly low health pools and will die pretty quickly on stack. Their Pounce still goes through Stability, but they can be pulled to the stack to cleave them down. Often this is done by the Kite if they are a Troubadour with  Temporal Curtain.
Elite Crocodilian Razortooth
Health | 1,061,748 |
In the Storm phase, it is the Stack’s main job to kill the Elite Crocs. “Dead” Crocs lie on the floor and can be fed to Kela. Doing so resets the Relentless Speed stacks that Kela gains across the phase. It is possible to fully kill a downed Croc, but not advised as we want the speed reset.
Crocs have a leap skill (Pounce) that will usually one-shot people who get hit by it. Due to this, healers are encouraged to bring increase res % traits where possible ( Medic's Feedback,
  Protective Reviver etc). Pounce knocks people down and cannot be mitigated with Stability, Distortion, Invulnerability or Blocks/Aegis.

Pounce can be baited by those it targets (the linked person with a red diamond over them). This should be done slightly away from other people. If you are its target, walk away from the Croc and watch their animation. They charge up the Pounce in a “play pose” - their head is down and their backside is up, like a dog’s “play with me” pose. They charge up the Pounce for about 2s before they jump in your direction. It is this jump that you want to dodge.
Lightning Strikes
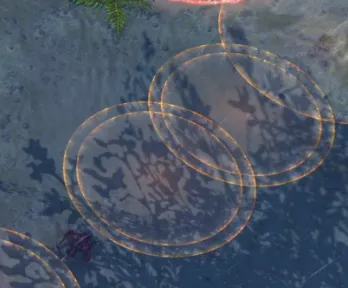
During the Storm phase, Lightning Strike circles appear in random patterns on the floor. These will stun people that they hit. They can be mitigated with Stability or Aegis. The best way to deal with them is just to walk or dodge out of them.
Squad Composition
Most groups will run primarily power classes. The fight generally requires plenty of Stability or Stunbreaks - bringing your own can really help. Superspeed can also be useful for getting out of Sand or Waves, or in case Kela accidentally gets too many stacks of @RelentlessSpeed.
A common composition is:
- 1 Heal Kite (often a Troubadour)
- 1 Stack Heal
- 2 Boondps
- 2-3 Ranged Dps
- 3-4 Melee Dps
Ranged Dps
Many squads will run 2-3 Ranged Dps players. These are usually Dps players with piercing ranged weapons and skills (deadeye, virtuoso being the most common). They are brought to help with Crabs, especially during the Storm phase, or if Crab 4 spawns.
There is a priority list of what a Ranged Dps should be doing in the Storm phase:
- If fixated by an Elite Croc, bait the Pounce and try and stack the Crocs to make them easier to kill.
- Kill close Crabs whose Sand may cover part of the middle lane.
- Help kill the first set of Elite Crocs.
- Kill far Crabs.
- Help kill the second set of Elite Crocs.